
Add hand-drawn visuals to Miro with Drawify
Drawify for Miro gives you access to hand-drawn illustrations while you work on a Miro board. Open Drawify images from Miro's Creation toolbar to find visual elements for a workshop, strategy map, presentation or collaborative exercise.
If you sign in with a Drawify account, you can also reach your saved favourites, Drawify projects and uploaded images from the app.
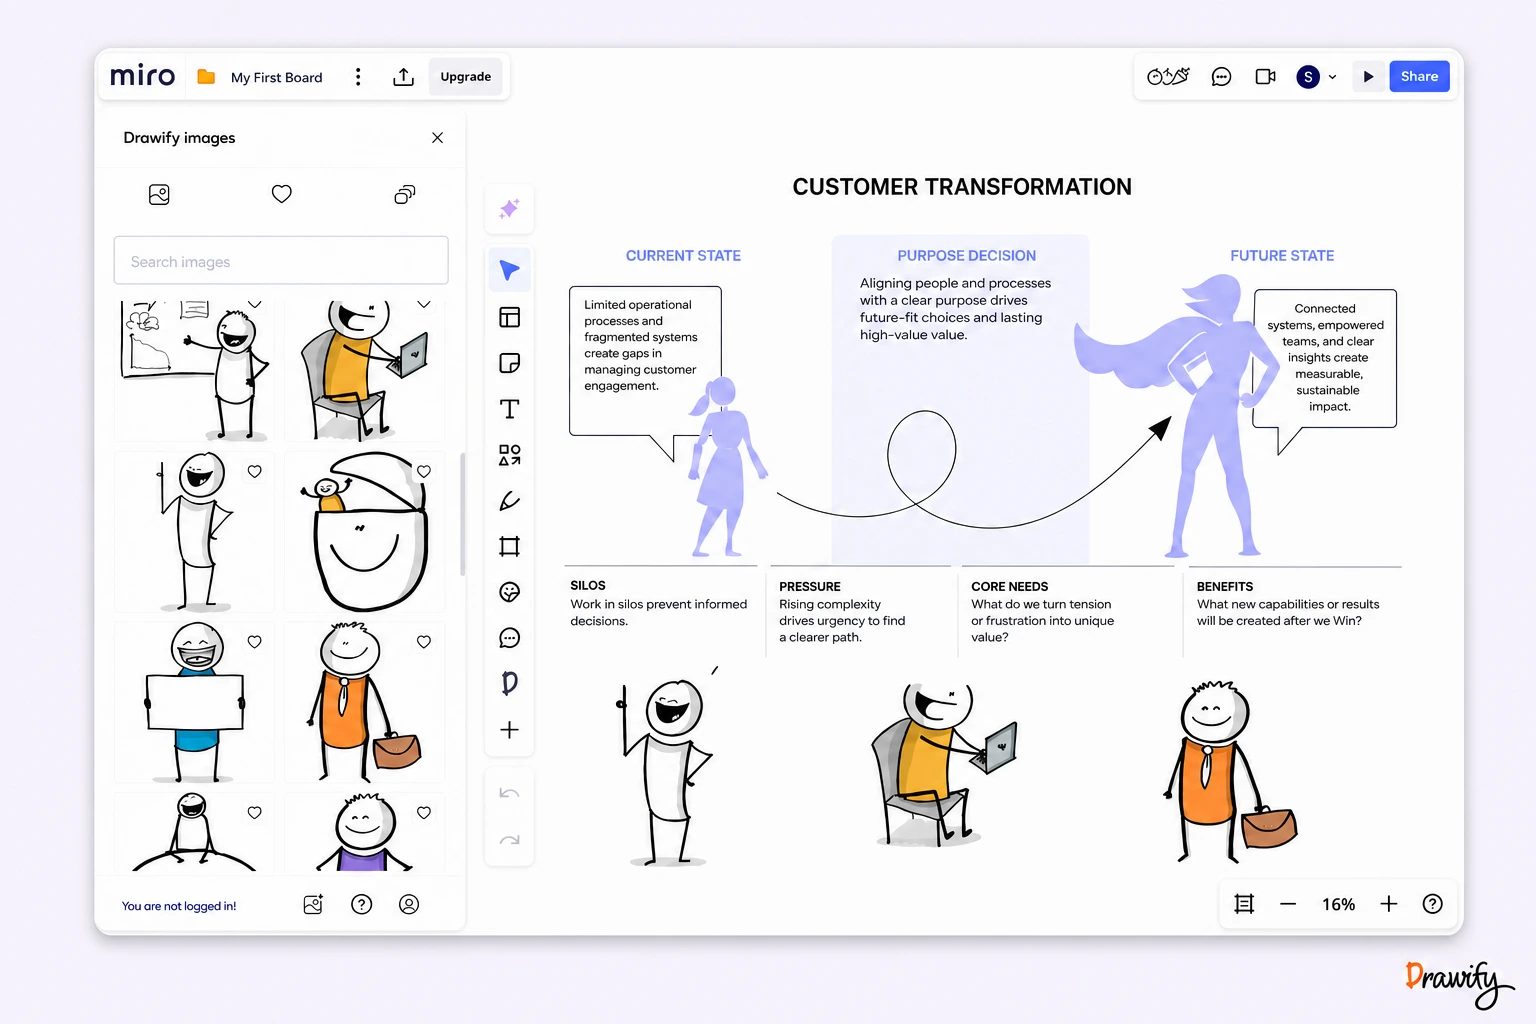
What is Drawify for Miro?
Drawify for Miro is an app that brings Drawify's hand-drawn visual library into the Miro workspace. It helps you add people, objects, arrows, frames, backgrounds and other illustrated elements to a board without drawing them yourself.
Miro remains the collaborative board where your team maps, discusses and develops ideas. Drawify provides visual material you can use on that board.
The integration is useful when words, sticky notes and shapes need a more human or memorable visual layer.
What can you do with Drawify in Miro?
Find hand-drawn illustrations without leaving your board
Open Drawify images from the Miro Creation toolbar and look for illustrations that support the point you want to communicate. The library includes characterful people, objects and visual building blocks such as arrows, frames and backgrounds.
Use your saved Drawify content
When you connect a Drawify account, the Miro app can give you access to illustrations you have marked as favourites, projects you created in Drawify and images you uploaded to your Drawify account.
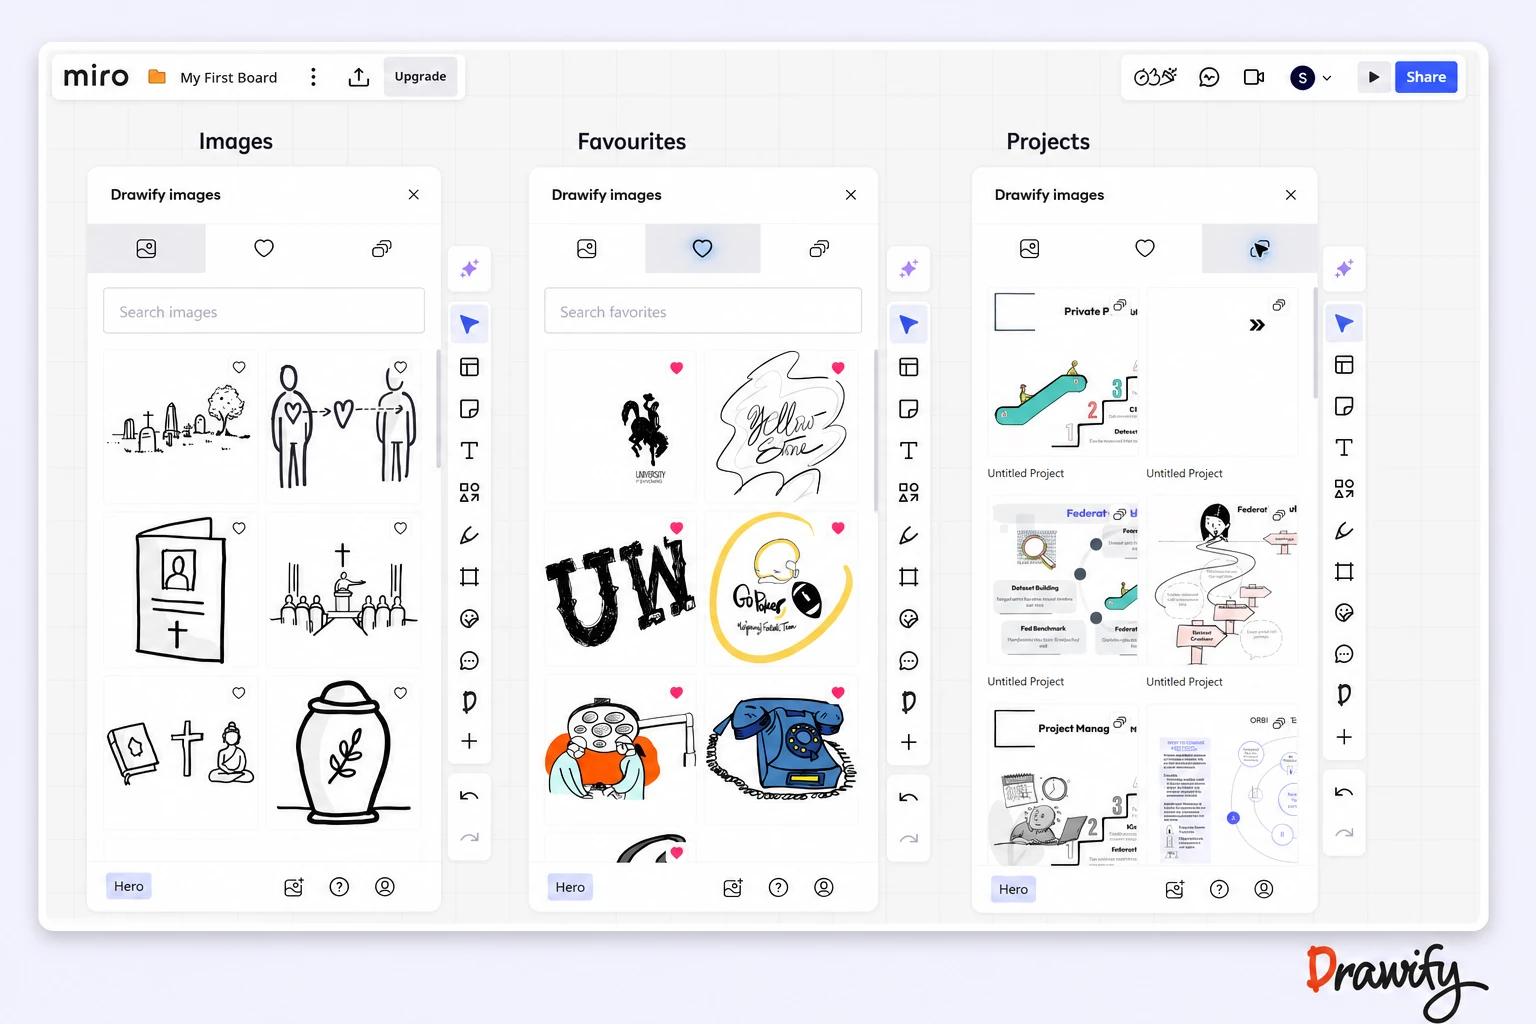
Bring a composed Drawify project into Miro
Some ideas need more than a single image. You can first combine illustrations, text and other elements as a project in Drawify, then bring that project into your Miro board through the Drawify app.
This gives you a way to prepare a visual story and use it as part of a wider collaborative board.
See how Drawify works if you want to understand the broader Drawify creation workflow.
Build on the visual inside Miro
After adding Drawify content, place it alongside the notes, frames, diagrams and other material on your board. Your team can continue working with the board using Miro's own collaboration and facilitation tools.
How to use Drawify for Miro
1. Install the Drawify app
Open the Drawify Images listing in the Miro Marketplace and connect the app.
You can also find apps from the Add more apps option in Miro.
2. Review and allow the requested permissions
On first use, Miro shows an Allow permissions for "Drawify images" screen.
The current Miro dialog says the app can read and modify boards the user has access to and read profile information for the current user. Review the permissions and your organisation's app policy before selecting Allow. Miro then returns you to the board.
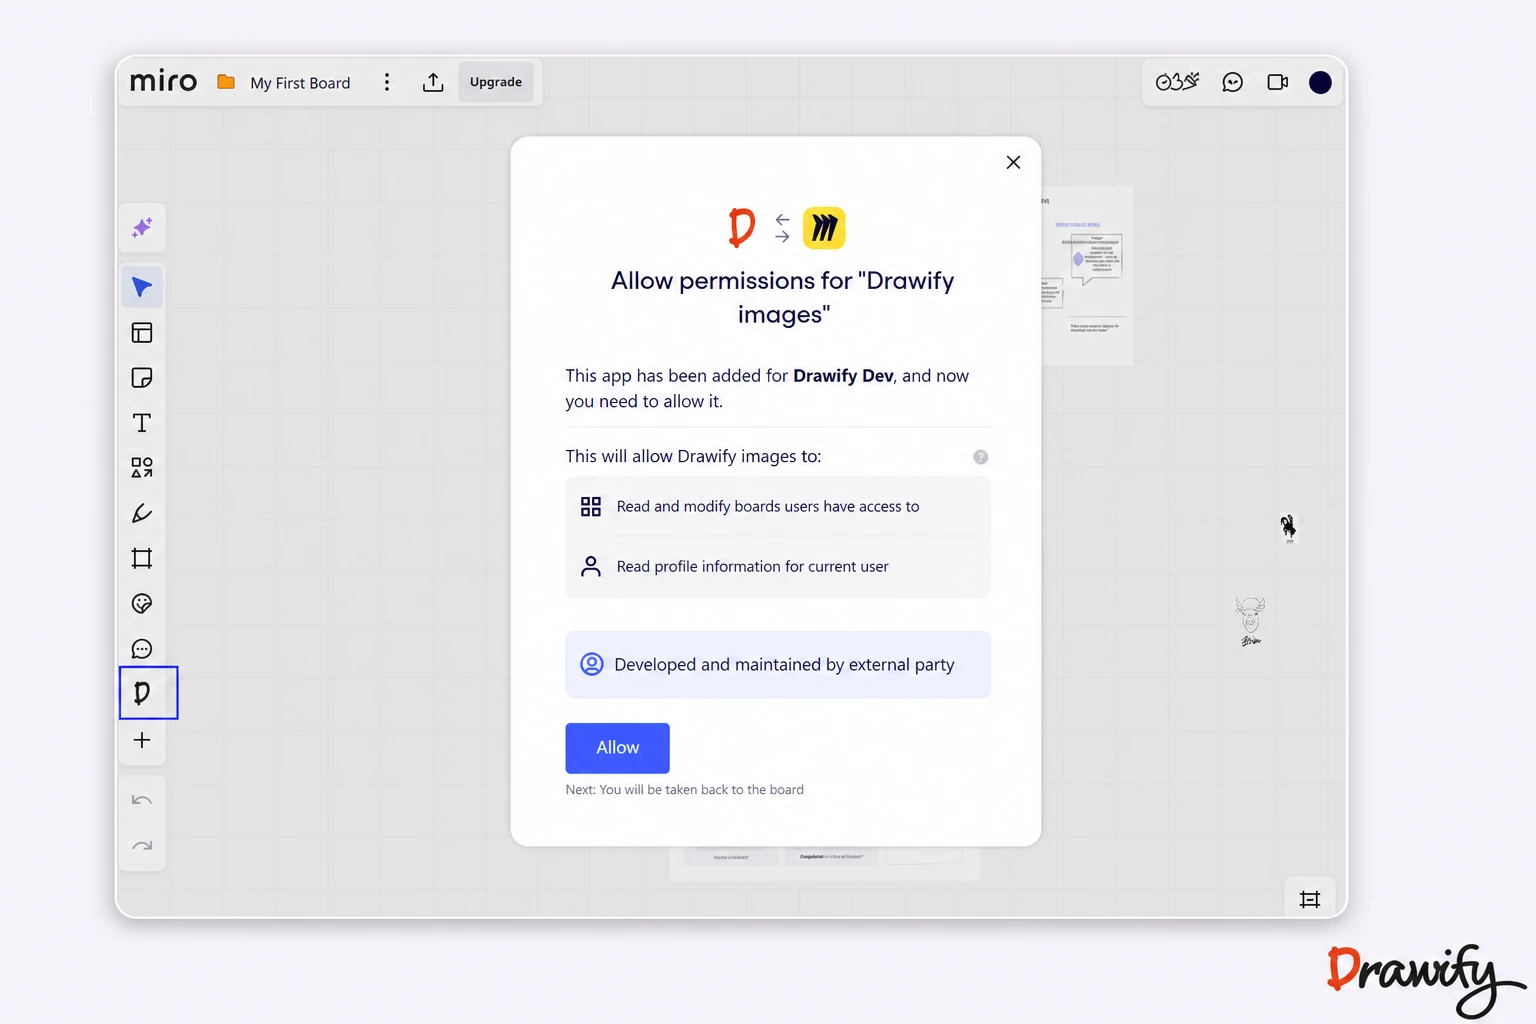
3. Launch Drawify from a Miro board
Open a board and select Drawify images from Miro's Creation toolbar.
4. Choose how you want to start
Browse the images available through the app, or sign in to your Drawify account for access to your saved Drawify content.
If you sign in through the Drawify website during this flow, you are returned to Miro afterward.
5. Find a visual for the idea
Look for an illustration or visual element that represents the message, activity or relationship you want people to notice.
6. Add it to the board and provide context
Place the visual near the relevant notes, steps or discussion area. Add a short label or sentence so participants understand what the image represents in this particular board.
7. Refine the board with your team
Arrange the visual with the rest of the board content and continue the workshop, planning session or presentation in Miro.
Practical ways to use Drawify on a Miro board
Workshop agendas
Give each stage of a workshop a visual cue so participants can see where they are, what activity comes next and what outcome the group is working toward.
Strategy and planning
Use illustrations to distinguish a current situation, a future direction, an obstacle, an opportunity or a stakeholder.
The images support the story; your board still holds the evidence, decisions and actions.
Customer journeys and service maps
Add people and objects to make roles, moments and environments easier to recognize across a journey. Pair every illustration with a clear label so the board remains precise.
Ideation and brainstorming
Use visual prompts to open up a conversation, group related ideas or help participants express a thought that is difficult to capture with a short text note.
Presentations in Miro
Add hand-drawn elements to frames that you plan to present. Use them to direct attention or explain a relationship, rather than decorating every available space.
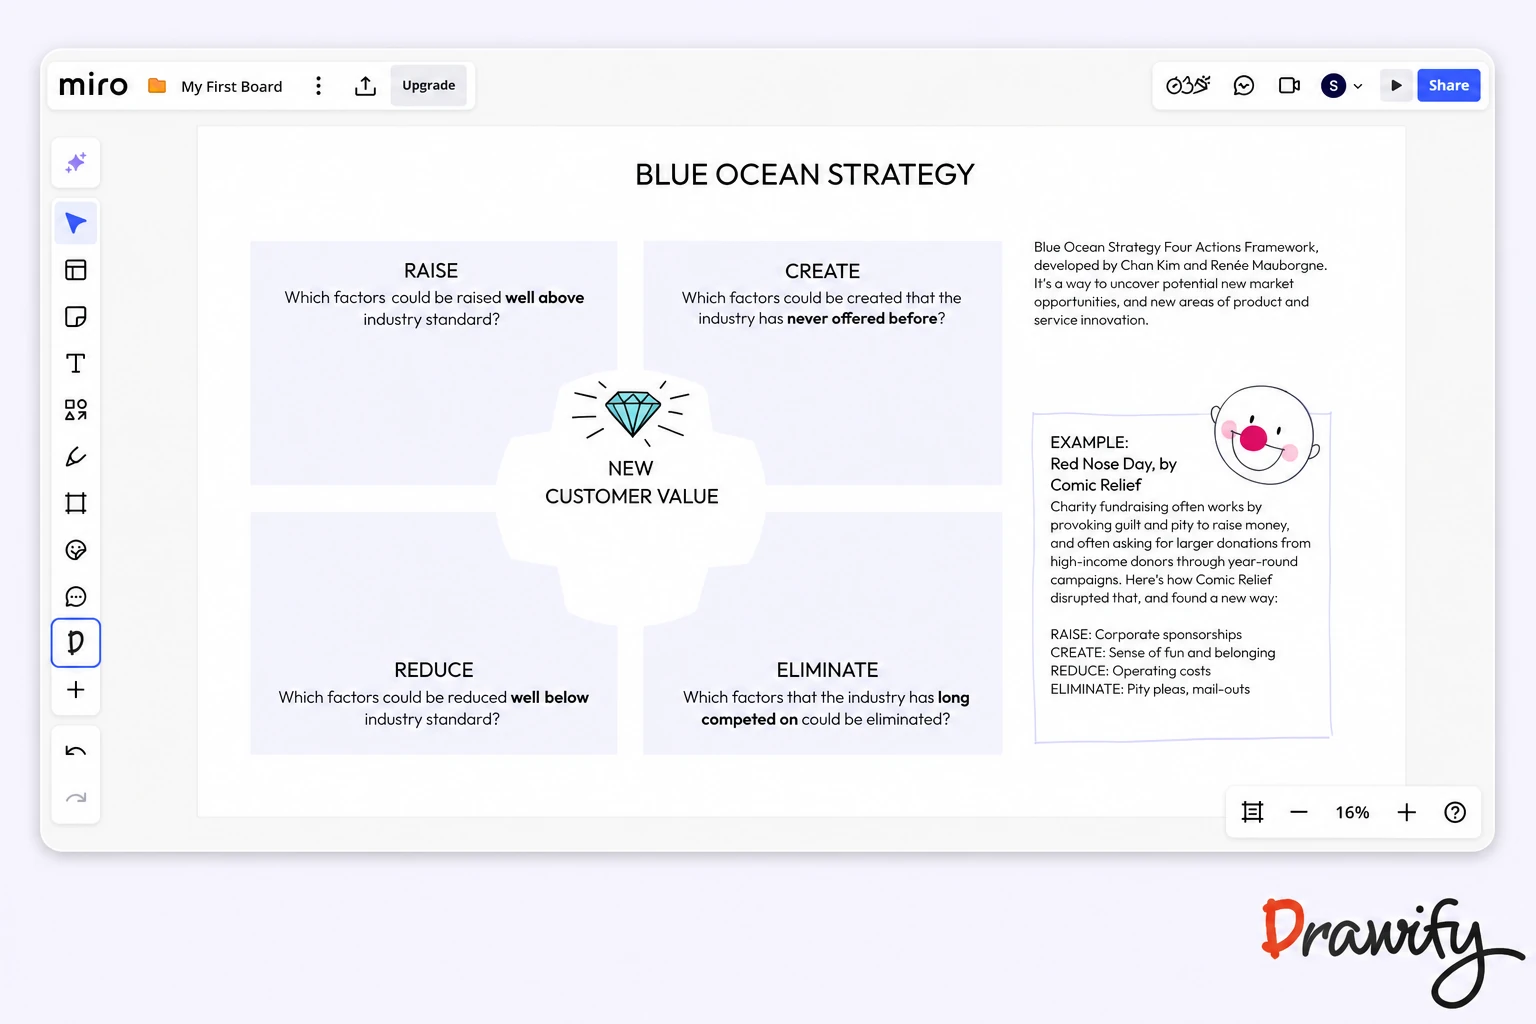
A simple workflow for clearer Miro boards
- Decide what the board needs to communicate.
- Build the board's basic structure in Miro.
- Identify the moments where a visual would improve recognition or understanding.
- Find individual illustrations in the Drawify app, or create a composed project in Drawify.
- Add the Drawify content to the relevant part of the board.
- Label the visual and check that it supports the message.
- Test the board from a participant's point of view before the session.
For more guidance on structuring visual communication, see the visual storytelling guide .
When should you create the visual in Drawify first?
Use an individual illustration directly from the Miro app when you need a person, object, arrow, frame or other simple visual element.
Create a project in Drawify first when the visual needs its own composition: for example, a small process, a before-and-after story or a scene made from several illustrations and text.
You can then bring the completed Drawify project into Miro and place it within the broader board.
What do you need?
You need an active Miro account and permission to install or use apps in the relevant Miro workspace.
Availability can depend on your organisation's Miro app settings. Miro identifies Drawify images as an app developed and maintained by an external party and displays its requested permissions before access is allowed.
A Drawify account is not required to begin with the free images described in the Miro Marketplace listing.
Connecting a Drawify account unlocks the account-based workflow, including access to saved favourites, Drawify projects and uploaded images.
Check the current Drawify pricing page and Miro Marketplace listing for plan details and terms before relying on plan-specific features.
Frequently asked questions
Does Drawify replace Miro?
No. Miro is the collaborative workspace where you build and work with the board. Drawify adds a library of hand-drawn illustrations and access to supported Drawify account content inside that workflow.
Can I use Drawify without leaving Miro?
You can browse and use Drawify illustrations from the Drawify app in Miro. If you want to create a more complete visual composition, you can build it as a project in Drawify and then bring the project into Miro through the app.
Why does Miro ask me to allow permissions for Drawify images?
Miro displays the app's requested access before first use. The current permission screen lists access to read and modify boards the user can access and to read the current user's profile information. Review this screen and follow your organisation's app-approval policy before allowing the app.
Can I access my Drawify favourites in Miro?
Yes. After connecting your Drawify account, you can access illustrations you have saved as favourites from within the Drawify Miro app.
Can I bring a Drawify project into a Miro board?
Yes. Create the composition as a project in Drawify, then access the project from the Drawify app in Miro and use it on your board.
Can I access images I uploaded to Drawify?
The Drawify Miro app supports access to image uploads associated with your connected Drawify account.
Is the Drawify Miro app free?
The Miro Marketplace currently lists Drawify Images as offering free and paid plans. Some images are available without a connected Drawify account, while broader Drawify access and account features depend on the current Drawify plan. Review the live marketplace listing and Drawify pricing page for the latest details.
Make your next Miro board more visual
Bring hand-drawn illustrations into the place where your team is already mapping ideas, planning work and running sessions.
Already use Drawify? Open the app from your Miro toolbar and sign in to access your saved content.
Get visualisation tips every week
Subscribe to the Drawify Newsletter, and feed your creativity with visualisation tips and techniques, as well as the latest Drawify workshops, news and resources.