Whether you've got stories to tell or art to create, there's a place for you here.

Online Course Creators
Creating Custom Icons for Course Assets
-
SDSwarnali Das- Co-founder, Chief Product Officer, Drawify
-
Oct 15, 2025 5 min read
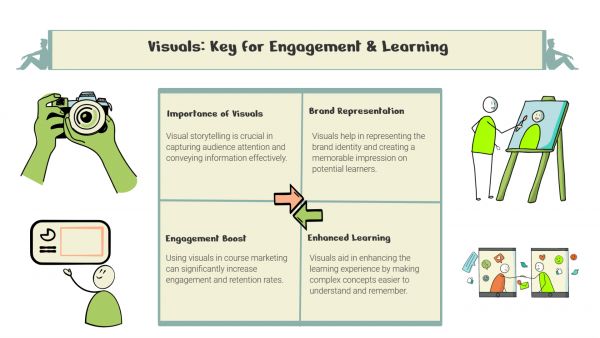
Visual consistency is just as important in today's e-learning setting as the quality of the content. Custom icons enable teachers and instructional designers to create a unified learning experience during interactive presentations and microlearning modules.
Icons serve a variety of purposes, including guiding students, reinforcing company identification, and simplifying difficult ideas.
Here's when Drawify comes in useful. Drawify gives course developers the ability to create and modify icons that precisely align with their course's aesthetics and learning objectives with its extensive library of drawings and simple customization tools.

Why Create Custom Course Icons with Drawify:
1. No Design Skills Needed:
Creating professional-looking icons doesn't require you to be a graphic designer. A few clicks on Drawify's user-friendly interface will allow you to customize the colours, shapes, and styles of pre-made icons.
2. Consistent Visual Language in All Modules:
Recognition is developed with consistency. By keeping your icon style consistent throughout classes, presentations, and handouts, Drawify makes it easier for students to browse course materials.
3. Visuals That Fit the Brand:
Icons can be readily modified by e-learning professionals to reflect brand colours, tone, or audience mood; this might be simple for business training or entertaining for K–12 students.
4. Collaboration Made Easy:
With Drawify's collaborative capabilities, educators, designers, and content creators can work together to generate visual assets that are consistent throughout all course assets.
How to Use Drawify to Make Custom Icons:
Step 1: Browse or Start from Scratch:
Explore the enormous icon sets available on Drawify. You can start with a blank surface or pick from categories like business, technology, education, and communication.
Step 2: Customize the Look:
Modify the outlines, experiment with other styles, and alter the colours to fit the topic of your course. Customization is possible with Drawify's editor without the complexity of using sophisticated design tools.
Step 3: Group and Label Icons:
For example, group icons for "learning objectives," "activities," and "assessments" to ensure that your graphics are clear and well-structured.
Step 4: Integrate and Export:
You may quickly incorporate icons into slides, LMS dashboards, PDFs, or infographics by exporting them in the PNG, JPG, SVG, or PDF format that you need.
Practical Use Cases for Course Creators:
- Interactive Course Dashboards: Make use of unique icons for feedback sections, progress markers, and lessons.
- Infographics and Handouts: Enhance the visual attractiveness and ease of digestion of information.
- Assessment Symbols: Create standardized icons for assessments, checkpoints, and feedback.
- Gamified Learning Paths: Create visual cues that inspire students through stages or victories to create gamified learning pathways.
Benefits for Educators and Designers: - Accelerates procedures for course development
- Enhances learner retention and engagement
- Strengthens the visual attractiveness and branding of the course
- Encourages clarity and visual accessibility
Custom icons enhance your course personality and coherence, turning text-heavy material into visually appealing yet simple to understand content. With Drawify, you create experiences that make learning unforgettable rather than just designing icons.
Make your course images as insightful and motivating as your content by starting to create your own individualized course icons using Drawify instantly.
Post This Article to Your Socials
Popular Topics
- Events
- Workshops
- Visual Storytelling
- How to video
- Communities
- Sketchnoting
- Templates
- UX Designers
- Agile Professionals
- Product Managers
- Freelance Graphic Designers
- Creative Tech Enthusiasts
- Online Course Creators
- Social Media Content Creator
- Creative Agency Owners
- Marketing Professionals
- EdTech Professionals
- Scrum Masters
Similar Articles

Come, Be Part of Something Special
-
Got ideas that need visual superpowers?
Jump in and start creating presentations and communications that people actually remember.
Sign In -
Are you an artist ready to grow?
Join our Drawifier family and focus on what you love most - creating art that matters.
Become a Drawifier
Get visualisation tips every week
Subscribe to the Drawify Newsletter, and feed your creativity with visualisation tips and techniques, as well as the latest Drawify workshops, news and resources.
